- Remove the preinstalled LANCOM R&S®Unified Firewall device from the packaging.
- Connect a patch cable to the port labeled eth1 on the front of your LANCOM R&S®Unified Firewall device and the Ethernet port of your computer.
- Connect a patch cable to the port labeled eth0 on the front of your LANCOM R&S®Unified Firewall device and the LAN port of the device (e.g. your router, DSL or cable modem) that you received from your Internet access provider. Make sure this device is switched on.
- Make sure the network adapter of your computer is set to "Automatically configure the IP address".
- Switch on your LANCOM R&S®Unified Firewall device.
- Start a web browser on your computer.
- Enter the following into the address bar of the browser: https://192.168.1.254:3438.
- Create an exception for the certificate warning. The LANCOM R&S®Unified Firewall login page appears.
-
On the login page of the LANCOM R&S®Unified Firewall web client, enter admin as
User Name and the default Password
admin.
Figure 1. Login page of the LANCOM R&S®Unified Firewall web client
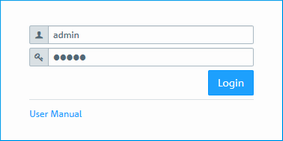
- Click on Login.
-
After the first login with the default credentials, the system prompts you to accept the End User License Agreement (EULA) and then change the following two passwords:
- The password for the user admin – you need this password to login to the LANCOM R&S®Unified Firewall web client.
- The support password – the support password is the password used by the technical supporter to login to your LANCOM R&S®Unified Firewall. Keep it secure and protected from unauthorized access.
Note:The new user password and support password must contain no less than eight and no more than 255 characters. You can use Latin letters, including German umlauts, as well as numbers and special characters. Do not use Cyrillic or other alphabets. You must use characters from at least three of the categories capital letters, lowercase letters, numbers, and special characters.
Allowed character set:[A-Za-z0-9]^_-`´~.,ß'!@#"§$%^&*()-=+\][{}|:/?>_<@äöüÄÖÜ*$Important:This step is mandatory.
-
Click on Accept & Login to accept the new passwords and the EULA.
The setup wizard appears.
Note:
With the exception of the language selection at the start of the setup wizard, you can cancel the wizard at any time with the Cancel Wizard button. After canceling the wizard, you can continue with a manual setup following the steps Configuring the Internet Connection and Enabling Internet Access.
For most of the setup wizard, you can use the Back and Next buttons to navigate.
-
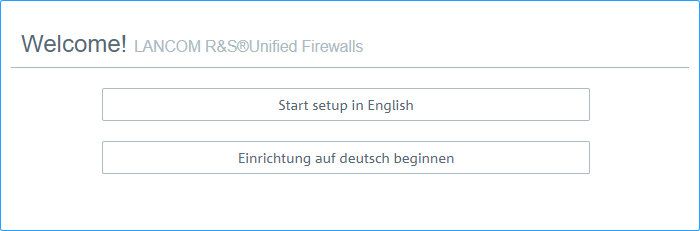
Select the language for the setup wizard and web client. You can switch the language of the web client later as
required.
Figure 2. Welcome page of the setup wizard
-
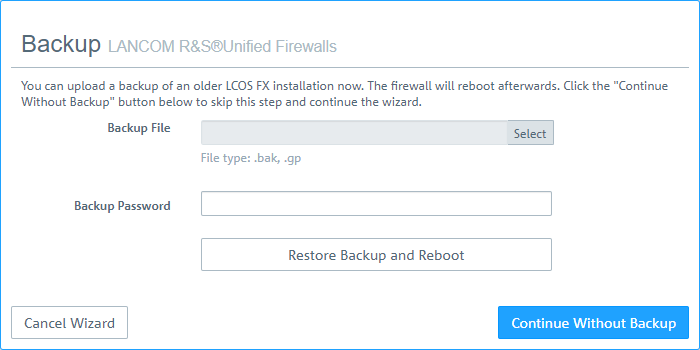
To restore the configuration from a previous installation, click on Select to choose a backup file. Enter the associated backup password. Then click Restore the backup and restart.
The setup wizard is then closed, the configuration is restored from the backup, and the firewall restarts.
Figure 3. Optional: Restore a previous configuration from a backupAlternatively, you can continue with a new installation with Continue without backup.
-
Configure the following general firewall settings:
- Firewall hostname
- Give your firewall a name to be used as the host name.
- Time zone
- The time zone is preset with the time zone currently set in the browser. Change this setting if necessary.
- Send usage statistics
-
You can optionally allow information about the firewall’s load and state to be recorded and sent to LANCOM Systems GmbH. No personal information or any of the firewall traffic will be transmitted.
Note: You can change this setting later. See also General settings.
- Send crash reports
- In the event of a crash, you can optionally allow general information about the system status, current system configuration and the occurring error to be transmitted to LANCOM Systems GmbH. The data is used solely for error analysis and is then deleted. No data is disclosed to any third parties.
Note: You can change this setting later. See also General settings.
Figure 4. General settings of the firewall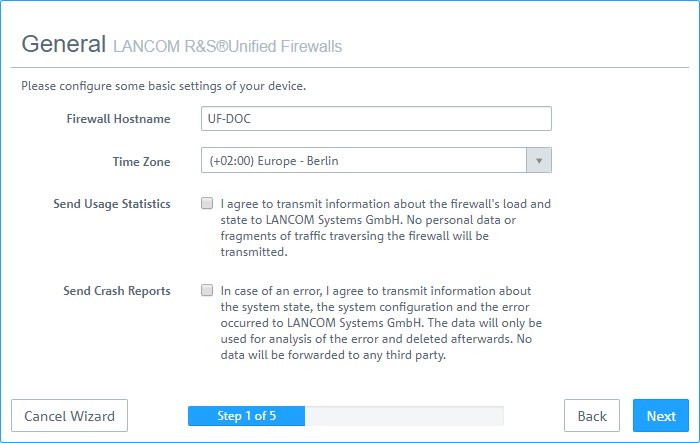
-
Set the Internet interface as the firewall port (default: eth0) that is connected to the device supplied by your Internet service provider. You then enter your option for Internet access:
Note: Depending on your selection, you can configure the relevant data.
- DHCP
- The IP address for this interface is obtained via DHCP.
- Static configuration
- Enter the IP address with prefix length (CIDR notation), the default gateway and the DNS server.
- ADSL / SDSL
- Enter the username and the password that you have received from your Internet service provider.
- VDSL
- Enter the VLAN ID, the username and the password that you have received from your Internet service provider.
Figure 5. Internet access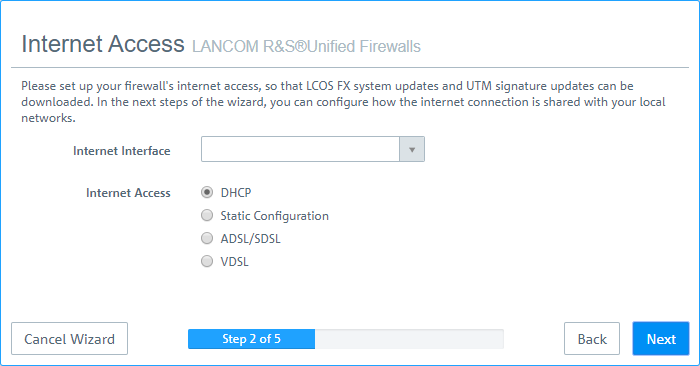
-
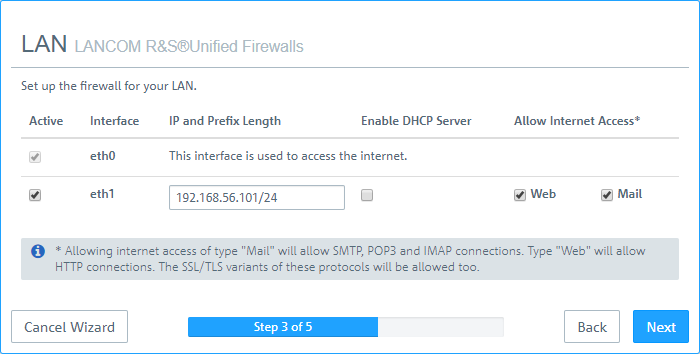
Here you configure the local network to which the firewall is (to be) connected. Each line corresponds to a network interface of the firewall (Interface column).
You can enable/disable an interface, depending on whether you want to use it or not (Active column). The Internet interface cannot be deactivated.
In the field IP and prefix length, enter the IP that the firewall should use on this interface, together with the prefix length (CIDR notation). If you leave the field blank, the firewall will not have an IP connection on this interface. If this is the case, you will be unable to use this interface to access the firewall and you cannot provide a DHCP server, web or mail access for clients connected via this interface. Each interface should have its own subnet.
To enable a DHCP server on an interface, select the appropriate checkbox Enable DHCP server. The DHCP pool depends on the firewall IP associated with this port and is preset to the largest continuous range available on the subnet.
You can permit typical Internet applications (Web and Mail) for clients connected to an interface by selecting the corresponding checkbox. Web allows clients to connect to the Internet via HTTP. Mail enables SMTP, POP3 and IMAP traffic. This includes the SSL/TLS versions of these protocols.
Figure 6. Local networks
-
Select the security features Anti Virus, IDS and/or
Content Filter, which are to be activated. Depending on your device, not all features may be
available.
Important:
After being started for the first time, or following a re-installation, the LANCOM R&S®Unified Firewall runs for 30 days as a demo version. You cannot perform a backup during the trial period. At the end of the trial period, the firewall will retain your configuration. The UTM features will be disabled and you can no longer save any changes.
For more information, please see License.
Figure 7. Security features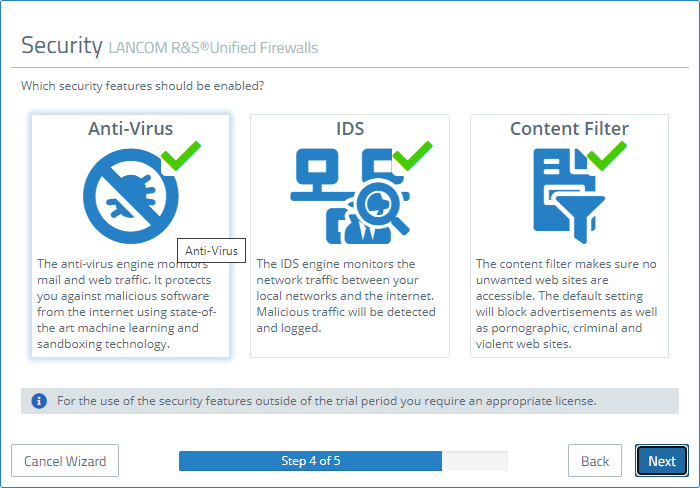
-
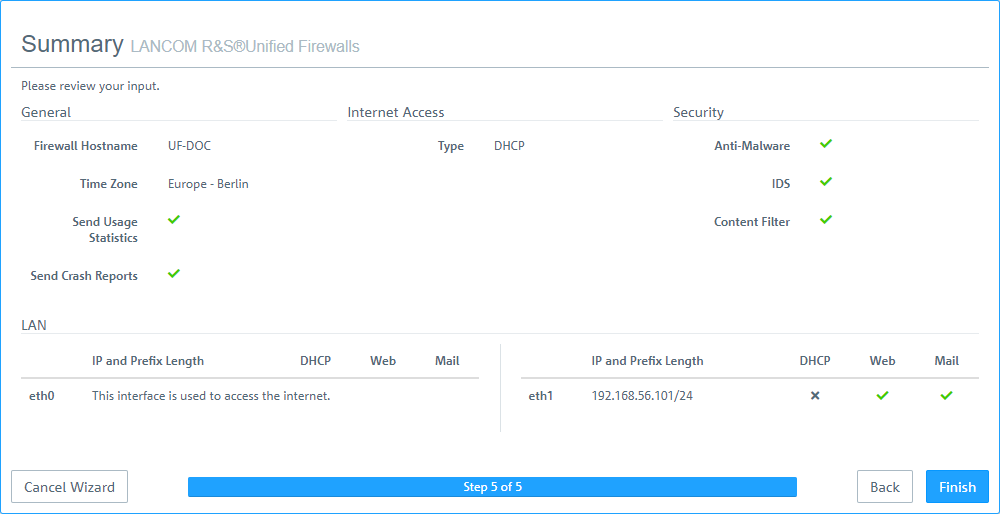
Here you see a summary of your settings and, if necessary, you can go back and adjust them. Click Finish if everything is to your satisfaction.
Figure 8. Summary of settings
-
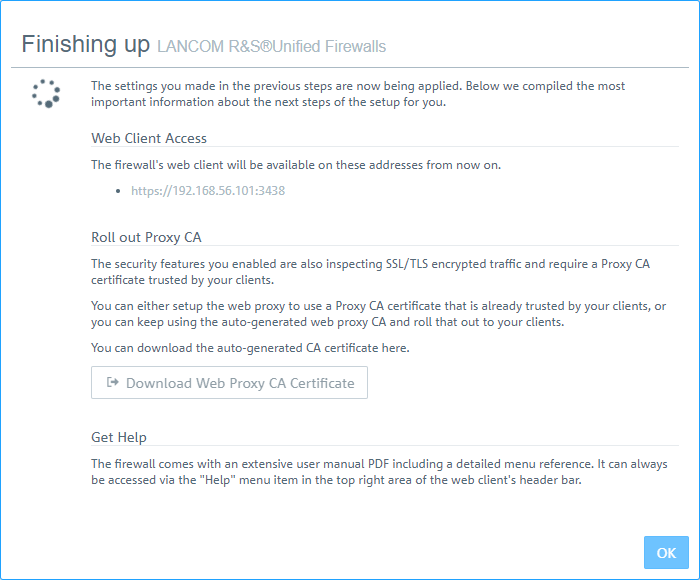
Wait for the setup wizard to finish. You will then see the links to use to access the web client after the setup wizard
has completed. You can either click these links or click OK to go to the web client.
If you want to use the automatically generated certificate for the web proxy, download it and roll it out to your clients.
Figure 9. Finishing up
LANCOM Systems GmbH | A Rohde & Schwarz Company | Adenauerstr. 20/B2 | 52146 Wuerselen | Germany | E‑Mail info@lancom.de