Certificate creation with WEBconfig

Note: You need the appropriate access rights to select, modify and assign profiles.

To create your certificates, navigate to the WEBconfig of the LANCOM device.

  1. To create a certificate using the web interface, navigate to the view Setup Wizards > Manage certificates and select Create new certificate.


  2. From the Profile name drop-down menu, select the profile to be used as the basis for the certificate.
    Tip: Empty templates only contain fields with the selection "No". If the user selects a profile based on an empty template, the input mask displays only the common name. The other profile fields retain the default values as set by the device administrator.
  3. Fill out the common name (CN) field. Set a validity period for the certificate and give it a secure password (PIN). The other fields such as Email and Organization name are optional information. However, under certain circumstance this information can help to find the certificate recipient if there are problems with the certificate.
    Note: The following characters are allowed in the password: [A-Z][a-z][0-9]#@{|}~!$%&'()*+-,/:;<=>?[\]^_. `
  4. To complete of the changes, click the Enroll (PKCS12) button. In the following dialog box, you can set the name and location of the file.
    Note: The newly created certificates appear in the certificate status table under Status > Certificates > SCEP-CA > Certificates.
  5. Issue the newly enrolled certificate to the recipient together with the access password set in step 3.


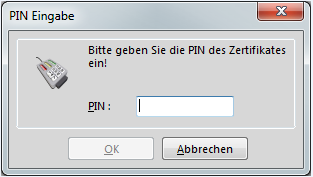
  6. The recipient is now able to use a secure VPN dial-in. For the dial-in to succeed, the user must enter the password (PIN) set in step 3.


www.lancom-systems.com

LANCOM Systems GmbH | A Rohde & Schwarz Company | Adenauerstr. 20/B2 | 52146 Wuerselen | Germany | E‑Mail info@lancom.de

LANCOM Logo