Initial situation: Two LANCOM routers connect to each other over a WAN connection. You want them to communicate securely with one another using a certificate-based IKEv2 VPN connection. Routers suitable for this purpose include LANCOM central-site gateways, WLAN controllers or LANCOM routers with an activated VPN 25 Option (when using the Smart Certificate feature).
Note: We assume that a WAN connection exists between the two devices.
Note: Certificates have already been created for the LANCOM routers.
-
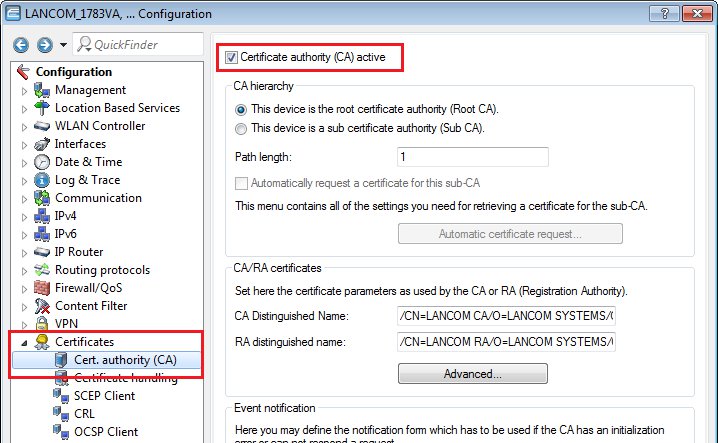
Enable the CA function in the LANCOM router at the headquarters:
Note: In this example configuration, the LANCOM router at the headquarters acts as the CA for creating the certificates (Smart Certificate feature). If you wish to use certificates from another CA, you do not have to use the CA in the LANCOM router and you can skip this step of the configuration.
-
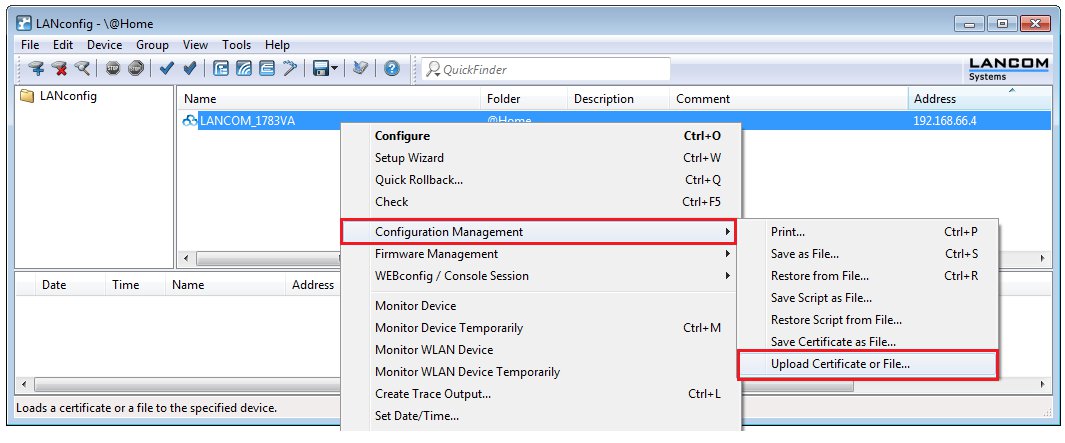
Uploading certificates to the LANCOM routers:
-
Right-click on each of the LANCOM routers in LANconfig and select the option .
-
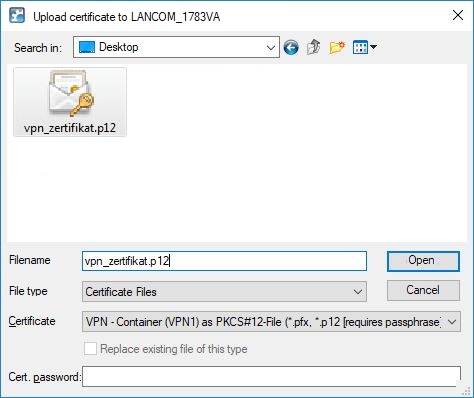
In the Cert. password box enter the password for the certificate file. Click on Open to start the upload.
-
Right-click on each of the LANCOM routers in LANconfig and select the option .
-
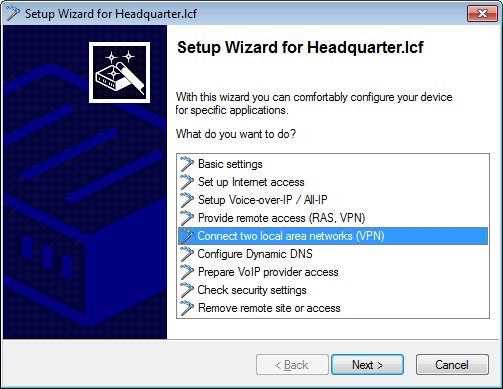
Configure the certificate-based VPN connection on the LANCOM router at the headquarters:
-
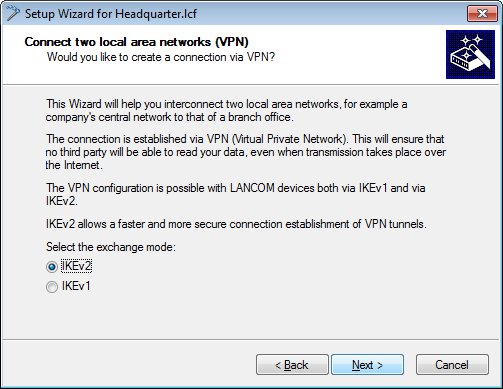
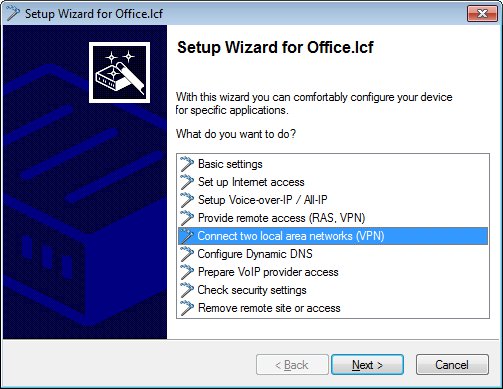
Start the Setup Wizard in LANconfig and select the option Connect two local area networks (VPN).
-
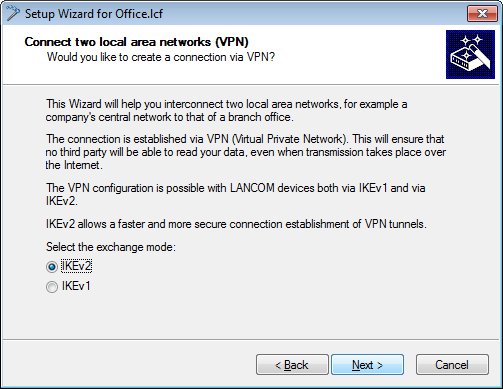
Now create an IKEv2-VPN connection.
-
In this example, we do not use IPSec-over-HTTPS.

-
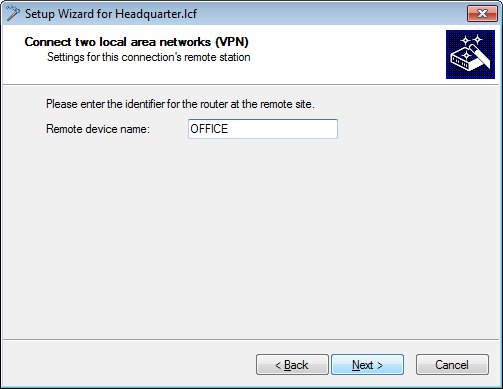
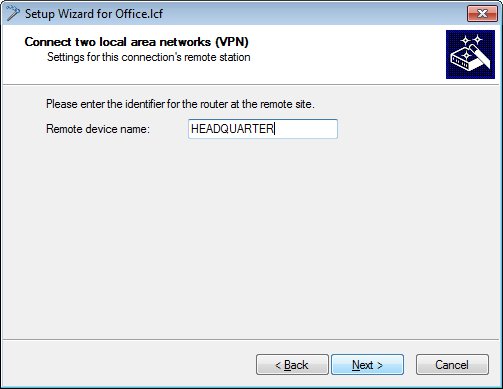
Enter a name for LANCOM router at the remote site.
-
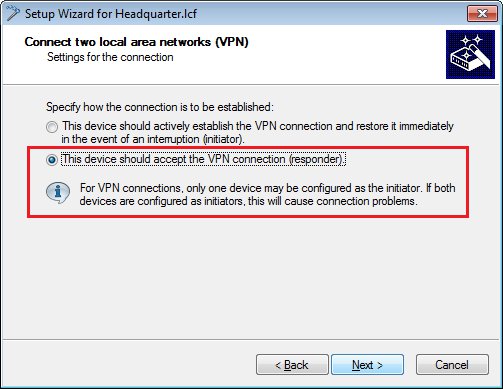
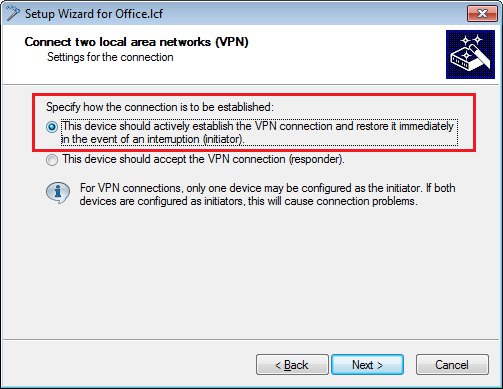
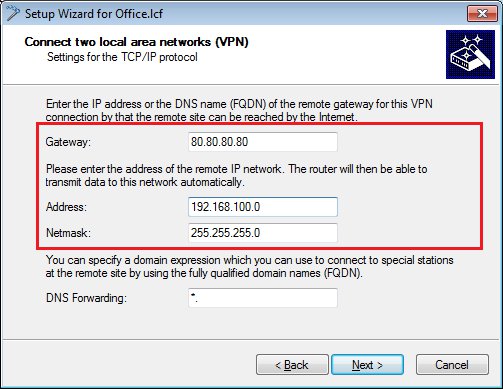
Since LANCOM router at the headquarters receives the VPN connection, no gateway address is required. Specify the local network to be accessed at the remote site.
-
Click on Finish to exit the setup wizard and write the configuration back to the LANCOM router.

-
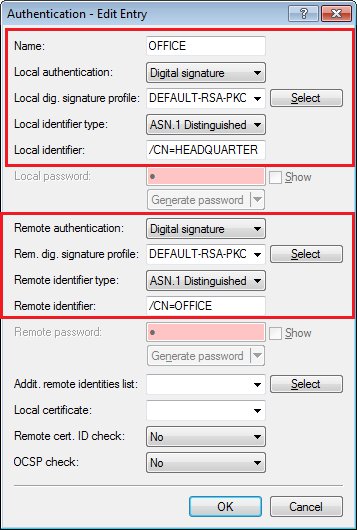
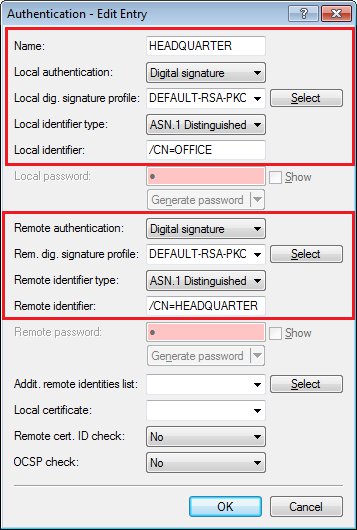
As the remote identity, enter the name of the certificate in the LANCOM router at the branch office.
-
Start the Setup Wizard in LANconfig and select the option Connect two local area networks (VPN).
-
Configure the certificate-based VPN connection on the LANCOM router at the branch office
-
Start the Setup Wizard in LANconfig and select the option Connect two local area networks (VPN).
-
Now create an IKEv2-VPN connection.
-
In this example, we do not use IPSec-over-HTTPS.

-
Enter a name for LANCOM router at the remote site.
-
The LANCOM router at the branch office should establish the VPN connection.
-
Specify the local network to be accessed at the remote site.
-
Click on Finish to exit the setup wizard and write the configuration back to the LANCOM router.
-
As the remote identity, enter the name of the certificate in the LANCOM router at the headquarters.
The certificate-based IKEv2 VPN connection to the headquarters will now be established. -
Start the Setup Wizard in LANconfig and select the option Connect two local area networks (VPN).