Proceed as follows to create device-specific configuration files:
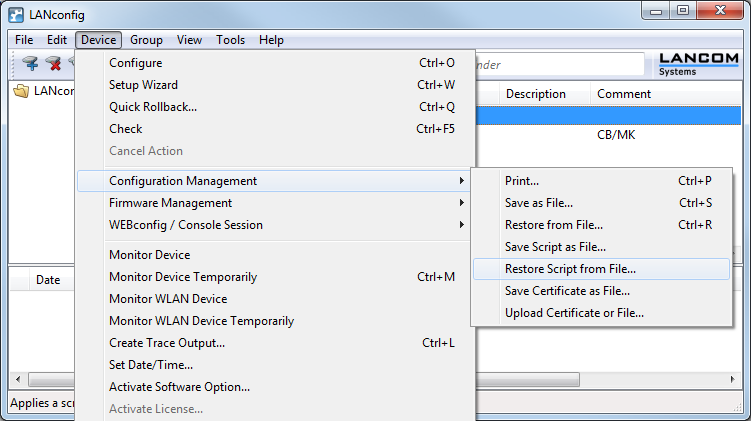
- Open the Import Wizard in the menu .
- If necessary, confirm the Welcome dialog with Next. The option to Skip this page on next call will suppress the appearance of the welcome screen when the Wizard is run in future.
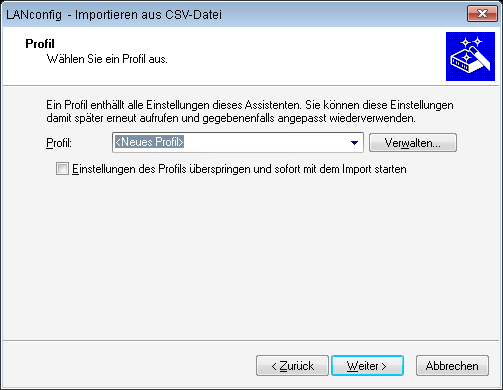
- If applicable, select the profile used for a previous data import. The option Skip profile settings and start the import immediately uses the settings in the selected profile without modification. Select <New profile> to use a new profile instead of an existing one. Click on Next.
- In the Data source field enter the path to the CSV file. With Browse ... you select the file from your local file system.
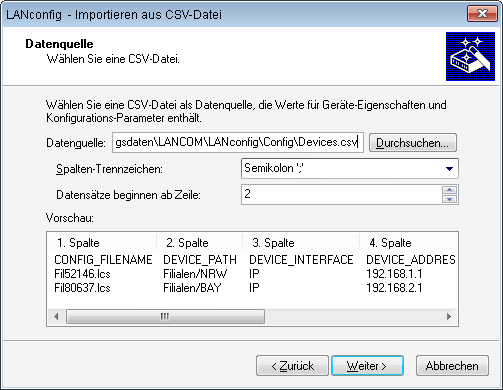
- You can select the column separator for the CSV file. The default is the semicolon.
- Set the row number where the data records start. This allows you to avoid importing any existing column headings and additional information. If a line in the CSV file contains only default variable names (see section Exporting CSV data sets), then this line is used to assign the variables automatically. This ensures that exporting and importing the same file will function without any manual assignment. However, if a configuration is generated with additional variables, the auto-detect will not function.
- The Preview field instantly shows the parameters you have selected for import. Confirm your entries with Next.
- To use the data records to create new devices in LANconfig, select the option Automatically create devices in LANconfig. After clicking Next, the following pages are used to select the device properties to be carried over to LANconfig.
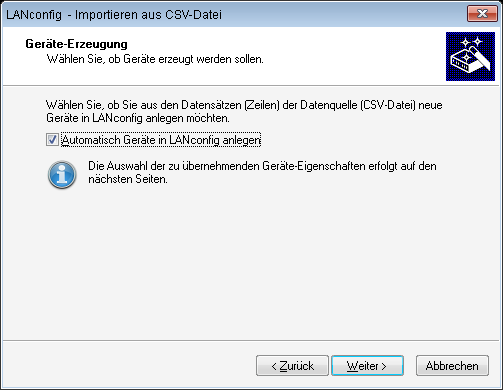
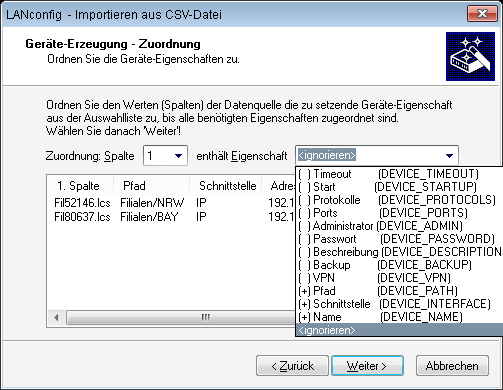
Note: If this option is disabled, the Wizard will skip the subsequent 2 steps. - The devices are identified using their connection address. Use the drop-down list to select the column in the data set that contains the connection address and click on Next. If you use default variable names, assignment takes place automatically.

- Align the columns according to the relevant device properties. Properties that have been aligned are marked in the list with a preceding "+". Then click on Next. If you use default variable names, assignment takes place automatically.
- You have the option to create individual configuration files from the data sets. Simply activate the option Generate configuration files.
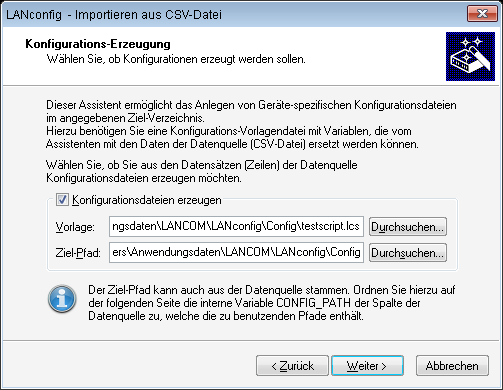
- Use the Template field to set the path to the template file to be used as the basis for these configuration files. By clicking on Browse you open the dialog for loading a configuration script template. In the fields Variable start and Variable end you define which characters (or strings) are to mark the start and end of the variables in the template file. This enables the Wizard to identify the variables in the template file.
- You specify the storage path in the field Target path. This is where LANconfig stores the new configuration files. Click on Browse to specify a target path on your local file system. Click on Next.
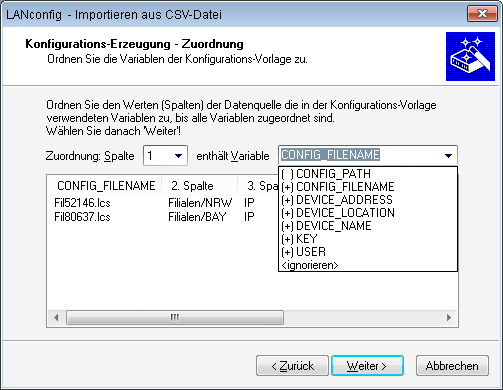
- Assign the columns in the data source to the variables used in the template file. Do this by selecting the column number from the list of columns and assigning this number to a variable from the properties list. Variables are also assigned automatically if the column headings contain the same variable names as those between the start and end characters in the script file. The column headings in the view below updates immediately with every change. To continue, click on Next.
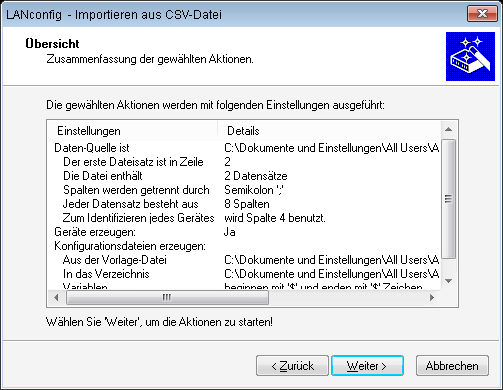
Note: If your entries are incomplete, the Wizard alerts you about potential import problems and suggests corrections. - The summary informs you about the actions that are executed in the next step. If you need to make any changes, click on Back. This returns you to the appropriate input mask. By clicking on Next you start the data import.
Note: If the data import would overwrite a device that already exists in LANconfig, the Wizard gives you the following options:- Overwrite the device.
- Create a configuration file, nevertheless.
- Use this decision for all other existing devices.
- The status dialog that follows indicates the actions performed. Click on Copy to clipboard to save the status message to the clipboard. Click on Next.
- Finally, you have the option to save the current import settings to a profile for future actions.
- Complete the import by clicking on Finish.
If you have opted to generate a custom configuration file, the Wizard saves a separate configuration file for each device in the specified folder. These configuration files are named according to the file name "<CONFIG_FILENAME>.lcs", which defines the CSV file:
lang English
flash No
set /Setup/Name "Fil52146"
set /Setup/SNMP/Location "Wuerselen"
cd /Setup/TCP-IP/Network-list
tab Network-name IP-Address IP-Netmask VLAN-ID Interface Src-check Type Rtg-tag Comment
add "INTRANET" 192.168.1.1 255.255.255.0 0 any loose Intranet 0 "local intranet"
cd /
cd /Setup/WAN/PPP
tab Peer Authent.request Authent-response Key Time Try Conf Fail Term Username Rights
add "INTERNET" none PAP "secret1" 6 5 10 5 2 "user1@internet" IP
cd /
cd /Setup/WAN/DSL-Broadband-Peers
del *
tab Peer SH-Time AC-name Servicename WAN-layer ATM-VPI ATM-VCI MAC-Type user-def.-MAC DSL-ifc(s) VLAN-ID
add "INTERNET" 9999 "" "" "PPPOEOA" 1 32 local 000000000000 "" 0
cd /
cd /Setup/IP-Router/IP-Routing-Table
tab IP-Address IP-Netmask Rtg-tag Peer-or-IP Distance Masquerade Active Comment
add 255.255.255.255 0.0.0.0 0 "INTERNET" 0 on Yes "default route"
cd /
flash Yes

# done
exit
The Wizard has replaced all variables with the appropriate device parameters.
This configuration file gives you the option to use LANconfig to transfer the device settings as defined in the template file to other devices. Highlight the appropriate device and click on .