-
Activate the options for the automatic acceptance of new APs and the provision of a default configuration under .
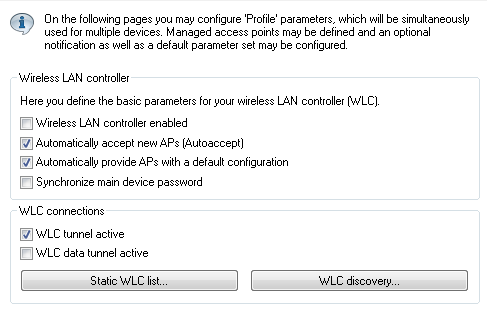
- Automatically accept new APs (Auto-accept) Enables the WLC to provide a certificate to all new APs without a valid certificate. To this end, either a configuration for the AP has to be entered into the AP table, or 'Automatically provide APs with a default configuration' has to be activated.
- Automatically provide APs with a default configuration: This enables the WLC to assign a default configuration to any new AP, even if no explicit configuration has been stored for it.
By combining these two options, the WLC can automatically integrate any managed-mode AP found in the LAN into its WLAN infrastructure. This may, for example, be a temporary measure during the rollout phase of a WLAN installation.
-
On the Profiles page, move to the logical WLAN networks. Add a new entry with the following values:
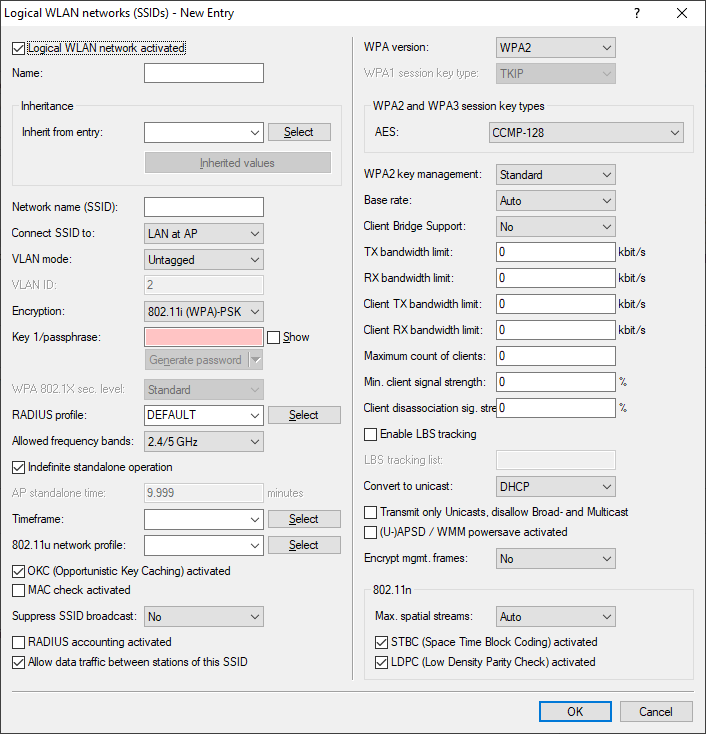
- Name: Give the WLAN a name. This name is used only for administrative purposes in the WLC.
- SSID: This SSID is used for the WLAN clients to connect.
- Encryption: Select the encryption method suitable for the WLAN clients being used, and enter a key or passphrase, as applicable.
- Deactivate the MAC check. Instructions on the use of MAC filter lists in managed WLAN infrastructures can be found under Checking WLAN clients with RADIUS (MAC filter).
-
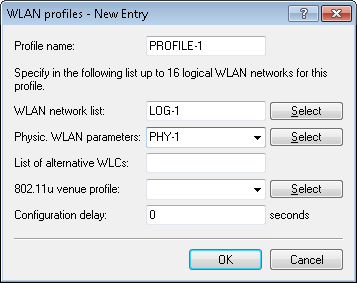
A new entry also has to be added to the physical WLAN parameters. In most cases involving the default configuration, just entering a name is sufficient. Adjust the other settings to meet your needs, if necessary.
Note: For normal AP applications you should use only the 5-GHz subbands 1 and 2. Subband 3 is for special applications only (e.g. BFWA, Broadband Fixed Wireless Access).

-
Create a new WLAN profile, give it an unique name, and assign the above logical WLAN network and physical WLAN parameters to it.
-
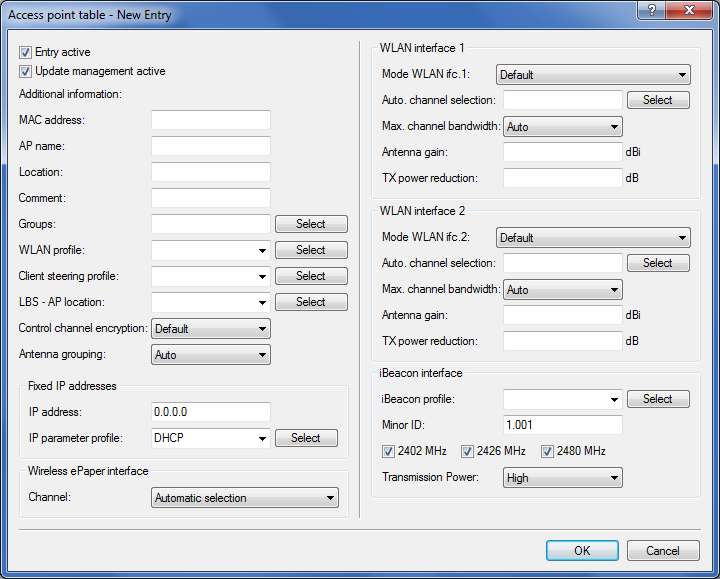
Change to the AP configuration view, open the Access point table and add a new entry by clicking on the Default button. Assign the WLAN profile to it as defined above. Leave AP name and Location empty.
Note: The MAC address is set to 'ffffffffffff' for the default configuration and it cannot be edited. This entry is thus a standard for any AP that is not explicitly listed in this table with its MAC address.