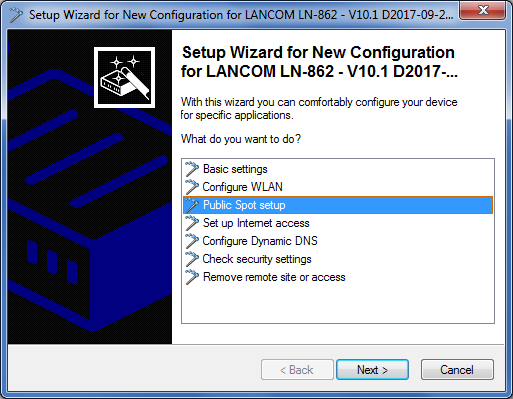
The following tutorial describes how to use LANconfig's Public Spot setup wizard to perform a basic Public Spot installation.
-
Start the Setup Wizard with , select the action Setup Public Spot and then click Next.
-
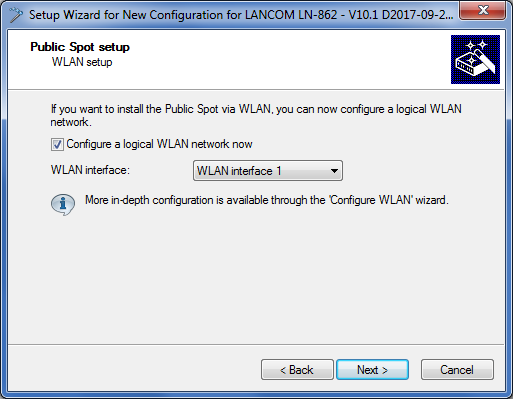
If you want the Public Spot to be available over WLAN, enable the corresponding option and then click Next.
-
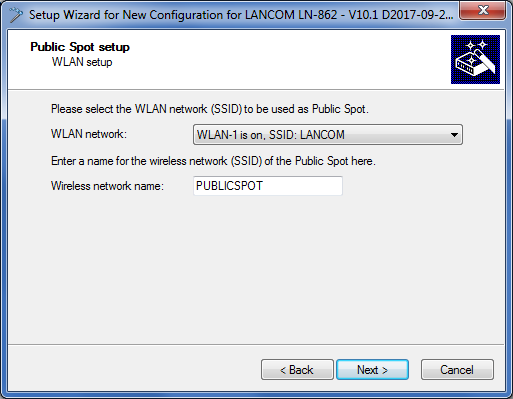
Select the logical interface from the drop-down menu which the Public Spot should offer (e.g., WLAN-1), and enter a descriptive name for the wireless network (PUBLICSPOT). Click on Next.
-
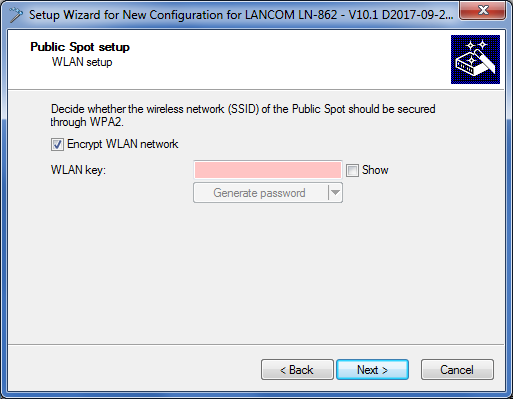
Specify whether the wireless network should be encrypted. In this case, specify a WLAN key or have it generated automatically.
-
Assign the IP address and netmask to the device that your Public Spot network should specify and click Next.
The Public Spot module has its own address on your network, which is independent from the address that you assigned to your device. For example, if you have a 192.168.0.0/24 network set up and your device has the IP address 192.168.2.1, you can assign the IP address 192.168.3.1 and the subnet mask 255.255.255.0, as long as this IP address has not already been used elsewhere.
If you want to separate the Public Spot network from internal networks for security reasons, make sure that the corresponding option is enabled.
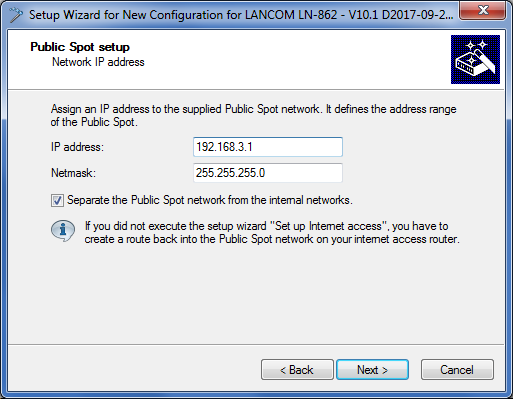
Note: If your device is not directly connected to the Internet and you have a different address range for your Public Spot, you must set up a return route to your Public Spot network on your Internet gateway. If there is no return route, Public Spot users will see an HTTP error after they have successfully authenticated.Please find the directions on how to set up a return route, in the documentation for your Internet gateway. In LANconfig you configure this under . To do this, create a new entry and enter the network address of your Public Spot network under IP Address and under Router enter the address of the Public Spot in your local network.

-
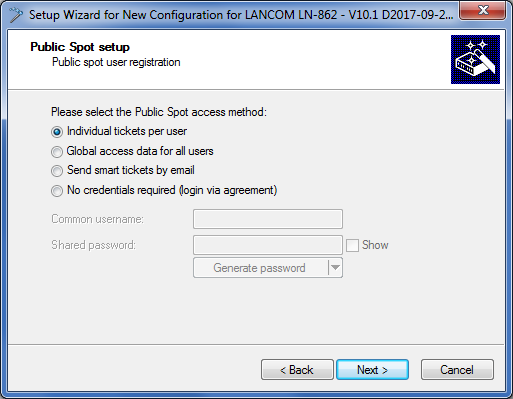
Specify which login data your users are to use to login to the Public Spot. Also, you can optionally add customized text to the login page. To continue, click on Next.
You can either give each user their own login data or set up a general account that all users use to access the Public Spot. If you issue vouchers later and would like to set up permanent user accounts, select the option Individual tickets per guest.
-
Here you can optionally select a login text, you set the access time and click Next.
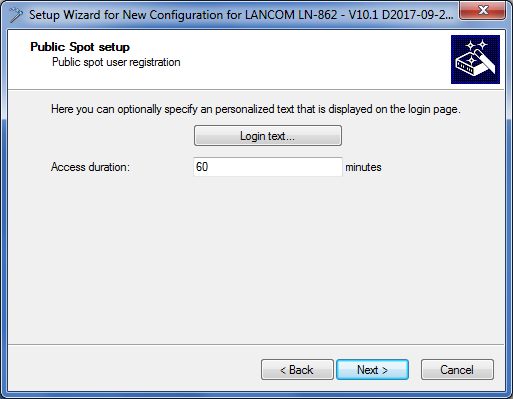
Login text (optional):
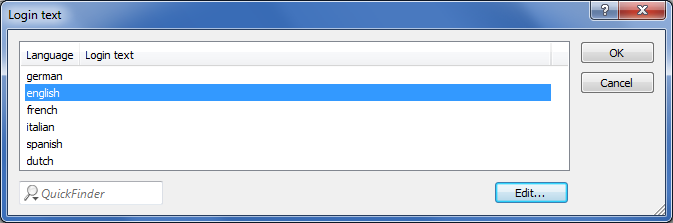
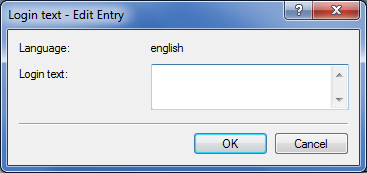
The login text is a customized text entered in HTML format, which appears on the login page inside the box on the registration form. You can manually add or edit this text at a later time (see the section Customized text or login title for the login page).
-
If necessary, create an administrator with limited rights who can use the setup wizards in WEBconfig to create and manage Public Spot users. To continue, click on Next.
This type of administrator is useful when you want your employees to be able to manage user accounts themselves without the help of a device administrator. The right to create new accounts in WEBconfig enables the Create Public Spot account wizard, and administrator rights enable the Manage Public Spot account wizard.
Using the user creation wizard Create Public Spot account, the administrator has the option of creating time-limited accounts for Public Spot users and print the corresponding login data on a voucher.
The Manage Public Spot accounts wizard enable the administrator to manage the users. The administrator can extend or reduce the validity period of access, or completely delete a specific user account. In addition, the administrator can call up information about the user account using the wizard, such as the password in cleartext, the authentication status, the IP address, the sent/received data volume or any restrictions that apply to the account.
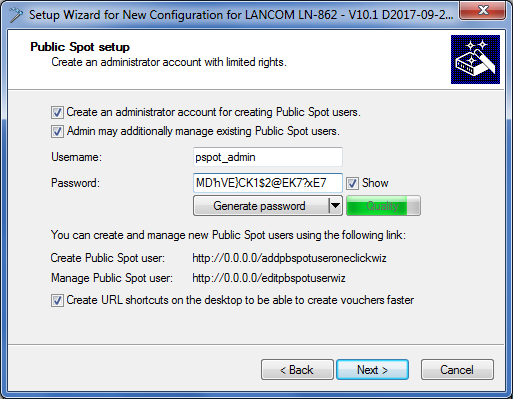
Note: Make sure that the password you create is secure. The Setup Wizard will check the quality of the password you enter. For passwords that are not secure the input field appears in red, when it is more secure it changes to yellow, and when it is very secure the background turns green. -
Select the procedure for user login. To continue, click on Next.
You can select HTTP or HTTPS in the drop-down list. Using a connection with HTTPS provides a secure connection for Public Spot users.
Note: The use of HTTPS requires the installation of a suitable server certificate. Otherwise the user is presented the device's own certificate, which would cause the browser to issue a certificate warning.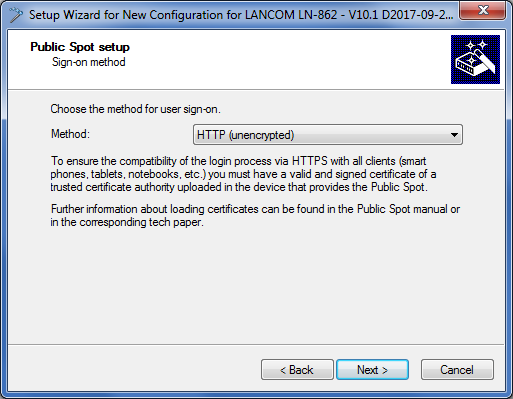
-
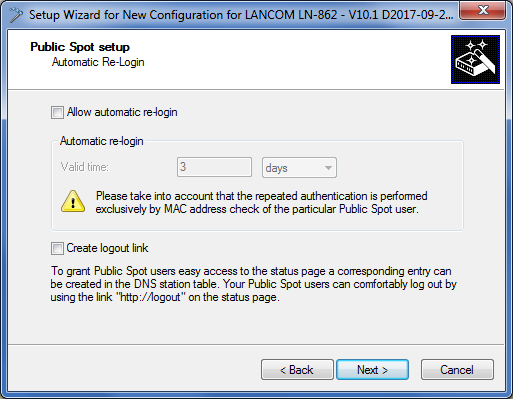
Determine whether automatic re-login is allowed for all Public-Spot users, and the maximum absence that is allowed before the user must login again on the Public Spot webpage. To continue, click on Next.
The Automatic re-login option is a convenience option that allows the Public Spot to automatically authenticate known users or devices. However, if known devices are to be recognized exclusively from the MAC address of the network adapter, the fact that MAC addresses can be falsified represents a potential security risk. For this reason this option is disabled by default.
-
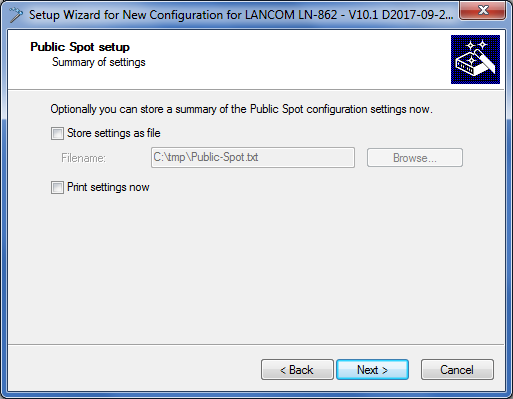
Save your changes if necessary.
Before you save the configuration to your device, you have the option to save the configuration locally on your PC or to print a summary.