Setting up a device for public-key authentication

This tutorial describes how to load the key file into the device and prepare the device for SSH authentication.
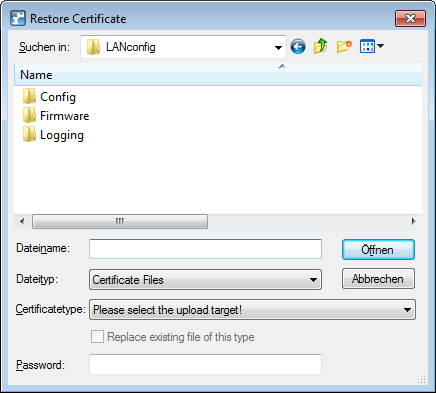
  1. Start LANconfig and select the device on which you wish to set up SSH authentication.
  2. Select Device > Configuration management > Upload certificate or file. In the window that opens, change the File type selection list to All files and the Certificate type selection list to SSH – accepted public keys.


  3. Select the public-key file you created previously and click Open. LANconfig then starts uploading the public key to the device.
    Important: The uploaded file replaces the list of previously accepted keys. Alternatively, you can edit the keys directly in WEBconfig and attach individual keys to the existing list (see Allowed SSH public keys).
  4. Open the configuration dialog for the device and navigate to Management > Admin > Access settings.
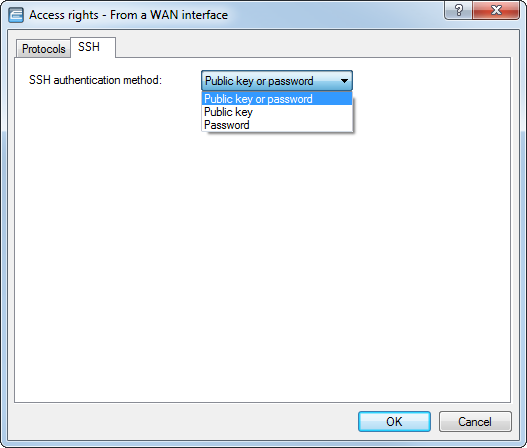
  5. In the section Configuration access ways, click on Access rights > ... > SSH and configure the SSH authentication method for each network.
    The authentication methods permitted for SSH access can be set separately for LAN, WAN and WLAN. The following options are available:
    • Public key or password: With this option, public-key authentication is attempted first. If this should fail, then a password query is issued.
    • Public-Key: With this option, only public-key authentication is attempted.
    • Password: Public-key authentication is switched off and a password query is issued.


  6. Close all of the configuration dialogs and write the configuration back to the device.

www.lancom-systems.com

LANCOM Systems GmbH | A Rohde & Schwarz Company | Adenauerstr. 20/B2 | 52146 Wuerselen | Germany | E‑Mail info@lancom.de

LANCOM Logo