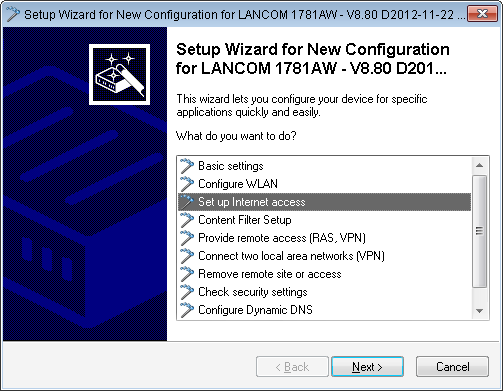
If you have connected up a new device but not have yet configured it, you have the option of using a Setup Wizard to set up IPv4 and IPv6 connections.
To save your entries and proceed to the next screen, click Next.
-
Then start the Setup Wizard in LANconfig. Highlight the device to be configured. The Setup Wizard is started either by right-clicking and using the context menu, or with the Magic Wand icon in the toolbar

-
In the Setup Wizard, select the option Set up Internet access.
-
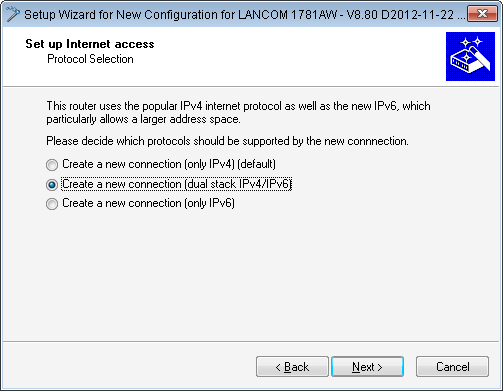
You can choose from the following options:
- Set up a dual-stack connection. This is IPv4-and IPv6-capable and currently the recommended option for a new device.
- Set up an IPv4-only connection.
- Set up an IPv6-only connection.
In the following we take you through the setup of a dual-stack connection. Activate the appropriate selection.
-
Set the interface to be used for the connection.
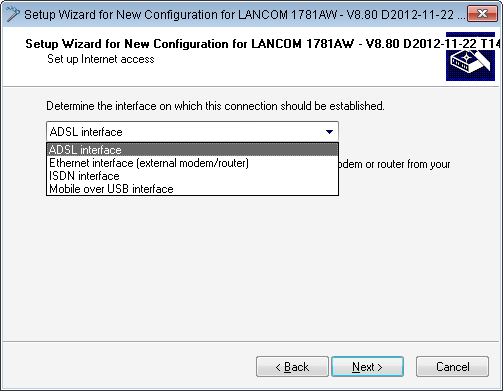
You can select from the following entries:
- ADSL interface
- Ethernet interface (external modem/router)
- ISDN interface
- Mobile over USB interface
-
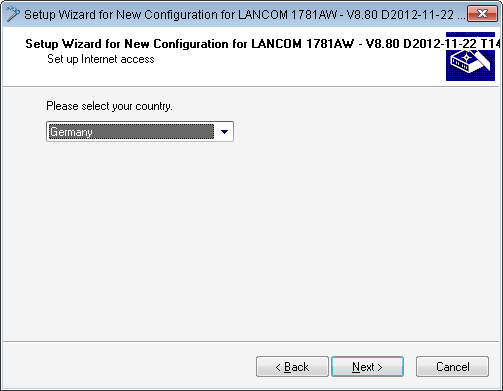
Select your country from the list.
-
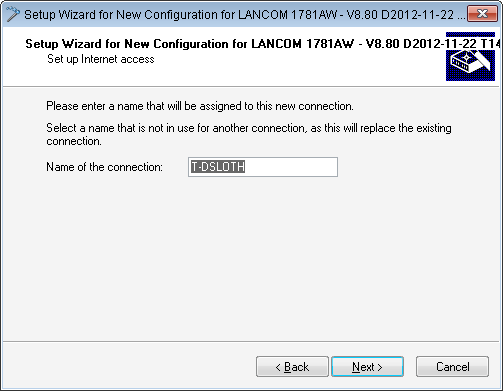
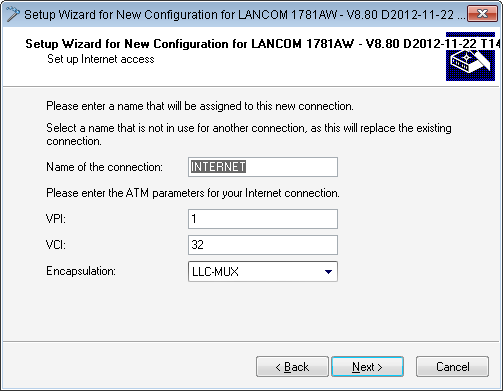
Enter a name for this connection.
If you access the Internet with an alternative connection, e. g. over a PPPoE connection, you should additionally enter the appropriate ATM parameters.
-
Enter the login details given to you by your provider for setting up your Internet access.
 Anmerkung: Depending on the provider, the type and number of fields may vary.
 -
Specify how you want the device to behave in case of disconnection. You can also specify if and when the device is to carry out a forced re-connection.

-
Define the type of backup connection to be used in case of connection failure.
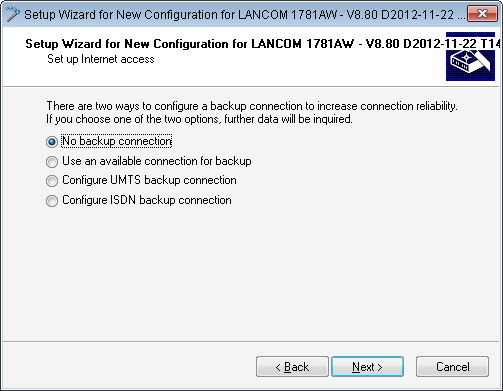
You can select from the following options:
- No backup connection: Skips the configuration of a backup.
- Use the connection already configured in case of backup: In the following dialog, select an already configured connection from a list.
- Setup a backup connection over UMTS: In the next dialog, set up a new UMTS connection. You will need the access data for your UMTS provider.
- Setup a backup connection over ISDN: In the next dialog, set up a new ISDN connection. You will need the access data for your ISDN provider.
-
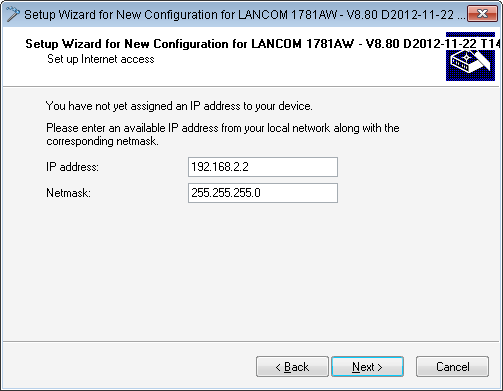
If your device does not yet have an IP address, enter a new IP address and corresponding netmask.
-
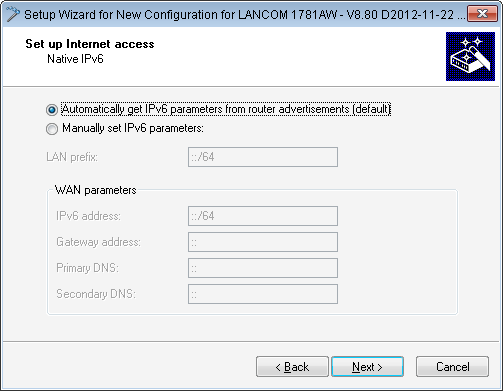
Select the type of IPv6 Internet access.
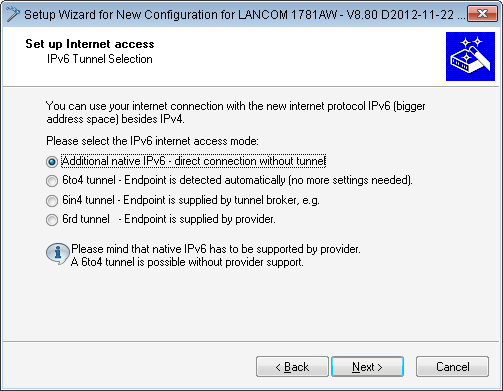
You can select from the following options:
- Additional native IPv6: Configure a direct connection without a tunnel.
- 6to4 tunnel: Start the wizard to configure a 6to4 tunnel.
- 6in4 tunnel: Use the input mask to set the parameters for the 6in4 tunnel.
- 6rd tunnel: Use the input mask to set the parameters for the 6rd tunnel.
Select the option for setting up a native IPv6 Internet connection.
-
Accept the default setting of Automatically take IPv6 parameters from router advertisements.