Enter the registration information for the first SIP user in the LANCOM Advanced VPN Client.
- On the ' SIP accounts' tab, use the Add button to create a new SIP account.
- For the provider setting, leave the entry as 'Custom' and activate the new account.
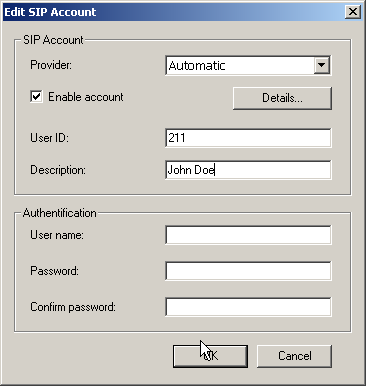
- For the 'User ID' enter the internal telephone number to be used by LANCOM Advanced VPN Client for taking calls and, optionally, enter a name for your phone under 'Description'; this name will be displayed on the other phone at the other end of the connection.
- With the button Details, open the dialog for the advanced settings and enter the following data:
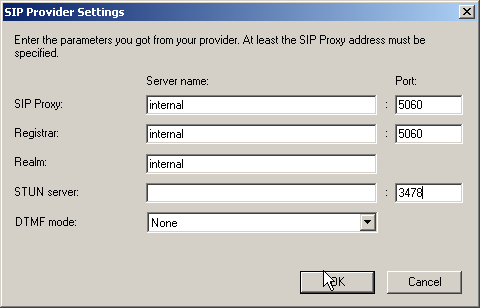
- As the 'SIP proxy' and 'Registrar', enter the internal VoIP domain for your LANCOM VoIP
Router (default: 'internal') if this also acts as the DNS server for the client; if not,
enter the LAN IP address.
- 'Realm' is always the internal VoIP domain.
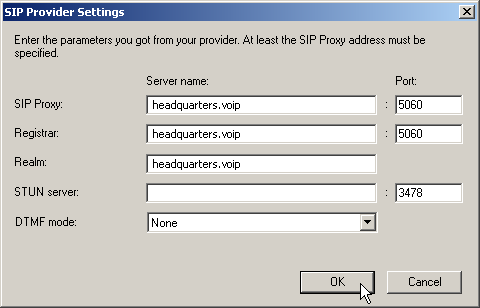
Note: With this information, the LANCOM Advanced VPN Client can register locally at a LANCOM VoIP Router and use the telephone lines defined there. - If the LANCOM Advanced VPN Client is to registering not only with the LANCOM VoIP Router locally, but an upstream SIP PBX (e.g. at Headquarters) as well, then enter under 'SIP proxy', 'Registrar' and, under 'Realm', enter the VoIP domain of the SIP PBX at Headquarters. On the LANCOM VoIP Router, an appropriate SIP-PBX line has to be configured with the same domain, and the router has to be the DNS server for the LANCOM Advanced VPN Client.
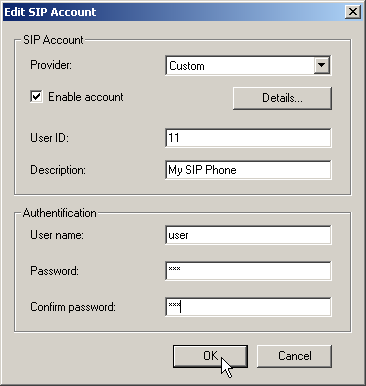
- Enter the SIP-account user name and password for logging in to the SIP PBX.
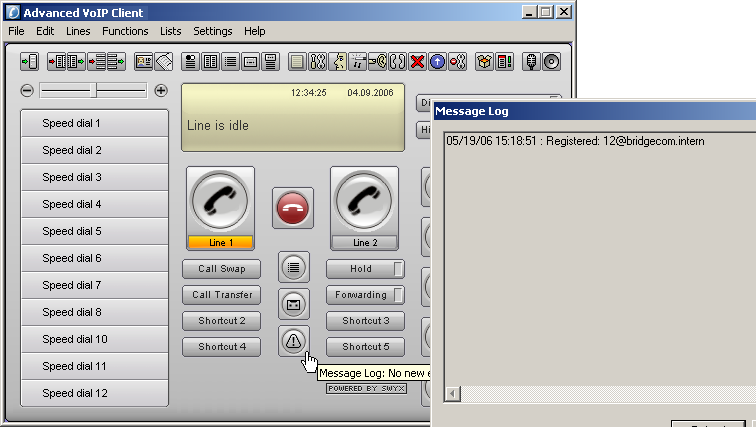
- You can check if the registration was successful by looking at the list of recent messages (via button or menu).
Note: On the tab 'Location' enter your international country code and local code, each without
their leading zero(s), and enter the national and international prefixes (e.g. '0' and '00').
The field 'Public line access prefix' is for the character your PBX or LANCOM VoIP Router uses
to access an outside line (e.g. '0' or '*').
Enter the registration data for the second SIP user in the VoIP telephone (example for Snom 190).
- From the Setup menu, select one of the possible lines, e.g. 'Line 2'.
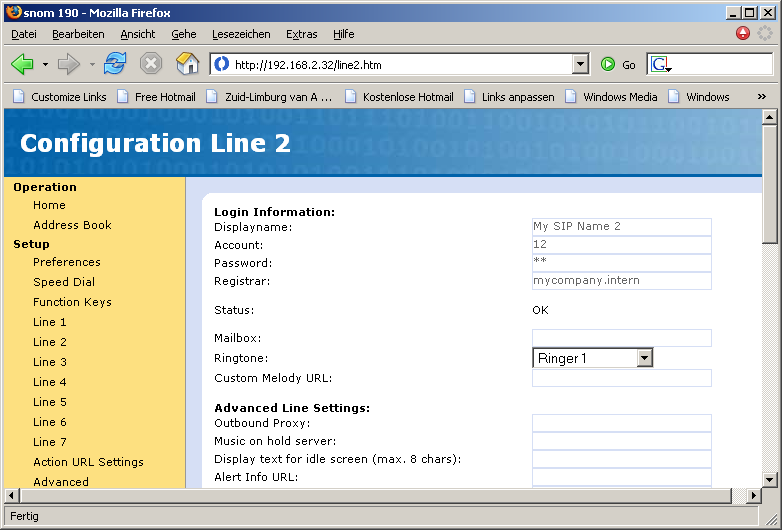
- Enter the following values:
- Registrar: Internal VoIP domain for the LANCOM.
- Account: Internal number for the user.
- Displayname: Name of the user as it is to be displayed at the remote site.
Note: If you use another softphone or VoIP telephone, please consult the documentation for this device for information on configuring the software.