There are three different ways to login to the LANCOM R&S®Unified Firewalls:
- Login via web browser
- Login via the LANCOM R&S®Unified Firewall User Authentication Client
- Login via the LANCOM R&S®Unified Firewall Single Sign-On Client
Login via web browser
If users have been set up as desktop objects and firewall rules have been configured for them, using the landing page will enable them to act in compliance with the rules. Logging in is possible with any browser and is SSL encrypted.
Follow these steps to login to your LANCOM R&S®Unified Firewall by web browser:
- Start a web browser.
- Check that cookies are enabled.
-
Enter the IP address of your LANCOM R&S®Unified Firewall, e.g.
https://192.168.12.1 (default port 443) into the address bar.
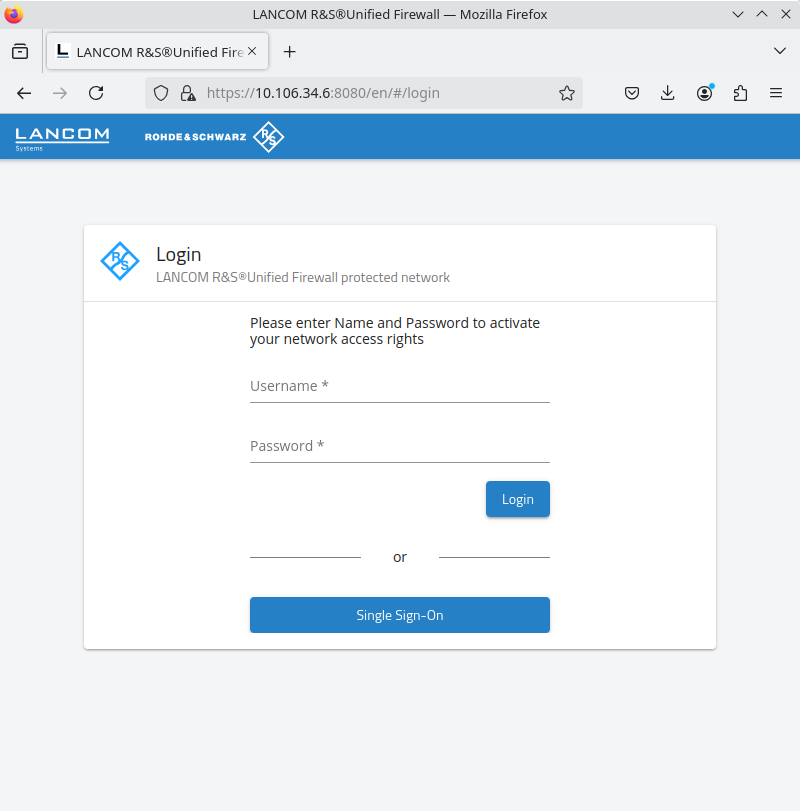
A web site with the LANCOM R&S®Unified Firewall landing page is displayed.
Figure 1. User authentication via web browser
-
If an IdP is configured, single sign-on is available as an alternative login method. In this case, click on
Single Sign-On. You will be redirected to the IdP and can authenticate yourself there. If
you are already authenticated, the page will open immediately.
Enter your username into the field Name.
Important: If the user is an LDAP user, the login name of the user must exactly match the name in the user’s sAMAccountName attribute. Otherwise, the name in the user-specific firewall rules will not match the name of the user logging in to the client, and the rules will not match.
- Enter the Password.
- Click on Login.
Authentication is performed.
For security reasons, the browser window used to log in must remain open throughout the session. Otherwise, the user is automatically logged out after one minute. This prevents unauthorized persons from gaining access to the firewall if a user forgets to log out.
Login via the LANCOM R&S®Unified Firewall User Authentication Client
The Windows-based LANCOM R&S®Unified Firewall User Authentication Client is located in the directory UA Client on the USB flash drive.
Follow these steps to use the LANCOM R&S®Unified Firewall User Authentication Client to login to your LANCOM R&S®Unified Firewall:
- Install the LANCOM R&S®Unified Firewall User Authentication Client.
-
Start the LANCOM R&S®Unified Firewall User Authentication Client.
Figure 2. LANCOM R&S®Unified Firewall User Authentication Client
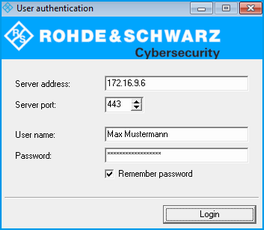
- Under Server Address, enter the IP address of your LANCOM R&S®Unified Firewall.
-
Enter your username into the field User Name.
Important: If the user is an LDAP user, the login name of the user must exactly match the name in the user’s sAMAccountName attribute. Otherwise, the name in the user-specific firewall rules will not match the name of the user logging in to the client, and the rules will not match.
- Enter the Password.
- Optional: Check the Remember password box to save the password for future logins.
-
Optional: Adjust the time window for the new connection under Settings
by right-clicking on the icon in the notification area of the Windows task bar.
Figure 3. LANCOM R&S®Unified Firewall User Authentication Client settings

- Click on Login. Authentication is performed.
For security reasons we recommend that the LANCOM R&S®Unified Firewall User Authentication Client should always be updated to the latest available version. However, there is a compatibility mode that allows older versions of the LANCOM R&S®Unified Firewall User Authentication Client to work with LCOS FX of version 10 and higher. Please refer to Settings for further information.
Login via the LANCOM R&S®Unified Firewall Single Sign-On Client
When using single sign-on (SSO), Active Directory domain users login to a Windows client. The rules configured on your LANCOM R&S®Unified Firewall that are relevant to these users are then applied automatically.
The following requirements must be met to operate SSO with a LANCOM R&S®Unified Firewall in an Active Directory environment:
- Since Kerberos is time-based, make sure that for all SSO components (domain controller, Windows client and LANCOM R&S®Unified Firewall) are all set with the same time and the same NTP server.
-
Create the user gpLogin
In the user administration of Active Directory, a normal domain user needs to be created under "CN=Users". This
user is then assigned a Service Principal Name (SPN), which is necessary to authenticate your LANCOM R&S®Unified Firewall at the server. The user does not need any special rights.
-
Open the domain controller.
Figure 4. Create a user
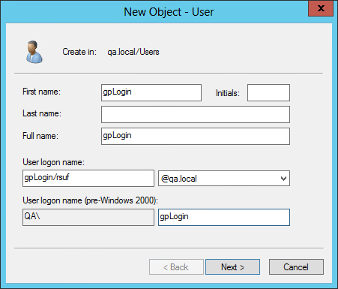
- Under First name enter gpLogin. This name makes it easier to find the user in the user overview later.
- Under User logon name enter gpLogin/<firewall name>. In the example above, the host name (<firewall name>) is that of your LANCOM R&S®Unified Firewall rsuf, hence the login name of the user is gpLogin/rsuf.
- Under User logon name (pre-Windows 2000) enter gpLogin.
- Click on Next.
-
Enter a password for the user and confirm this.
Figure 5. Enter a user password
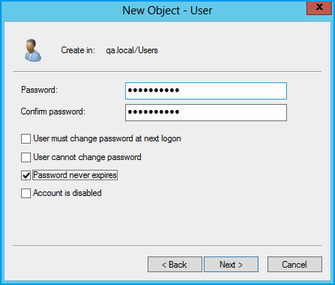
- Check the Password never expires box.
- Click on Next.
- To check the details of the new user, click Finish.
-
Open the domain controller.
- Login with the user gpLogin to query the Active Directory. In the input box User Name under Authentication Server, enter gpLogin.
- Configure the Service Principal Name (SPN). Assign an SPN to the newly created user so that your LANCOM R&S®Unified Firewall recognizes the domain controller as trustworthy. To do this, execute the following command on the domain controller: setspn -A gpLogin/rsuf gpLogin
-
Generate a Kerberos key
With the help of the LANCOM R&S®Unified Firewall Single Sign-On Client, a user login to the Windows
domain can be redirected to your LANCOM R&S®Unified Firewall. Your LANCOM R&S®Unified Firewall uses the Kerberos key to check the forwarded information and activate
the user-specific firewall rules. Proceed as follows to generate a Kerberos key:
- Login to your LANCOM R&S®Unified Firewall.
- Navigate to .
- On the Kerberos tab, click the Create Kerberos Key button to generate the Kerberos key.
-
Enable SSO on your LANCOM R&S®Unified Firewall
Proceed as follows to enable SSO on your LANCOM R&S®Unified Firewall:
- Set a checkmark in the Active check box on the Kerberos tab.
- Click Save to store your settings.
-
Prepare the Windows client.
The ZIP archive with the Windows Installer for the Single Sign-On Client can be found at:
https://www.lancom-systems.de/downloads/
There are three ways to install the LANCOM R&S®Unified Firewall Single Sign-On Client:
- Copy the standalone application UAClientSSO.exe to the desired location.
- Run the setup program UAClientSSOSetup.exe and install the standalone application UAClientSSO.exe to the following path: C:\Program Files\R&S Cybersecurity\UA Client\3.0\
- Install the client via the domain using the Microsoft installer UAClientSSO.msi in a group policy object (GPO).
Important:All of these methods install the independent application UAClientSSO.exe on the Windows PC. It can then be executed by specifying the following parameters:
- Hostname of the LANCOM R&S®Unified Firewall (for further information see Settings).
- IP address of the LANCOM R&S®Unified Firewall in the network of the client computer.
Example: Your LANCOM R&S®Unified Firewall has the hostname "rsuf". The IP address of the client computer on the network is 192.168.0.1. The target path for installing the LANCOM R&S®Unified Firewall Single Sign-On Client is therefore:
C:\Program Files\R&S Cybersecurity\UA Client\3.0\UAClientSSO.exe rsuf 192.168.0.1.