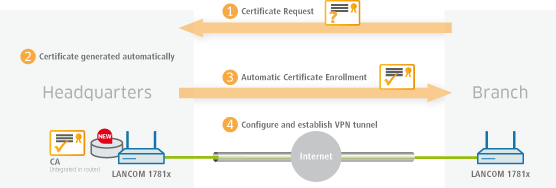
This tutorial describes how you enable a CA (certificate authority) on a LANCOM router and how the CA helps you to create and use new certificates for a VPN connection between two LANCOM routers (certificate distribution via SCEP).
-
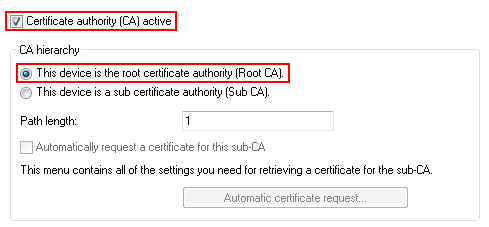
You enable the certificate authority in WEBconfig or LANconfig and you set the device as the root CA. You will find these settings under .
-
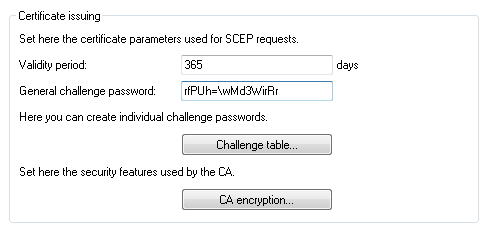
SCEP clients can automatically obtain certificates by SCEP (simple certificate enrollment protocol). A necessary step for this is for you to set a general challenge password in the root CA. Set a password at .
Note: If you write the configuration back to the device after enabling the CA, the CA automatically generates a general challenge password.
You are now able to create CA certificates for the VPN endpoints that will later provide the connection.
-
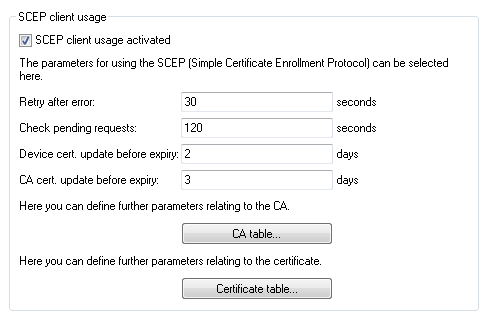
In order for the VPN endpoints to obtain their certificates via SCEP, the SCEP client must be configured on each of them. This setting is located under .
-
Specify the further information about the certificate authority under . This table contains information about the CA from which a certificate is to be obtained.
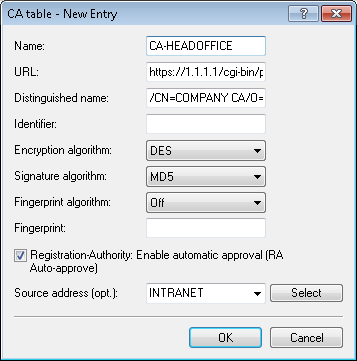
Name
The name can be freely selected and used to identify this device.
URL
The URL is always constructed in the same way: https://<IP address>/cgi-bin/pkiclient.exe. Replace <IP address> with the IPv4 address where the CA is accessible from the WAN.
Important: If the VPN endpoint is also the CA, you need to enter the loopback address here.Distinguished name
The distinguished name of the CA (see screenshot in step 1).
-
The additional information about the certificate that the CA is to issue to this device is specified under .
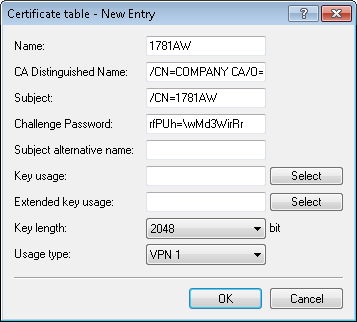
Name
The name can be freely selected and used to identify this device.
CA Distinguished Name
The CA distinguished name (see screenshot in step 1).
Subject
The desired distinguished name of the certificate. In this example, only the common name is used.
Challenge password
The general challenge password set on the certificate authority (see step 2).
Usage type
The location where this certificate is to be stored. In this example "VPN 1".
-
Specify the further information about the certificate authority under . This table contains information about the CA from which a certificate is to be obtained.
-
Once you have set up a SCEP client on each of the VPN endpoints, you can establish a VPN connection between two VPN endpoints. This is carried out via the Setup Wizard Connect two local area networks (VPN).
-
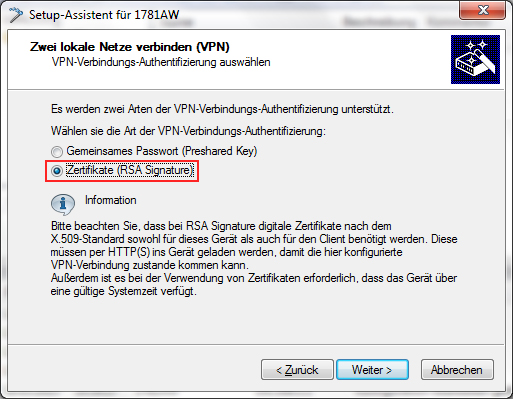
In the Setup Wizard, set the VPN connection authentication to Certificates (RSA signature).
-
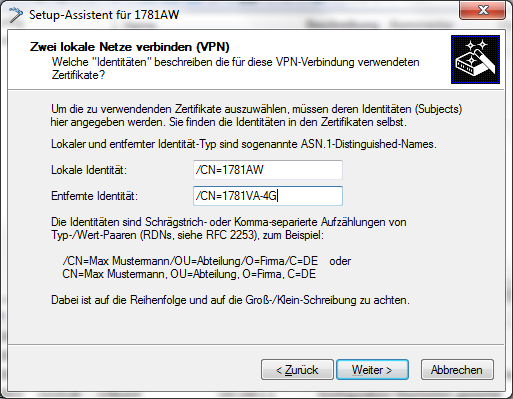
In the Local and remote identity window, specify the "ASN.1-Distinguished-Name". This is the official name of the certificate plus any additional information that you entered under "Subject" in step 3.b. For the Local identity, enter the information for the certificate on the local machine. The item Remote identity contains the certificate information of the other VPN endpoint.
-
In the Setup Wizard, set the VPN connection authentication to Certificates (RSA signature).