This tutorial describes how you enable a CA (certificate authority) on a LANCOM router and how the CA helps you to create and use new certificates for a VPN connection between two LANCOM routers (manual certificate distribution).

-
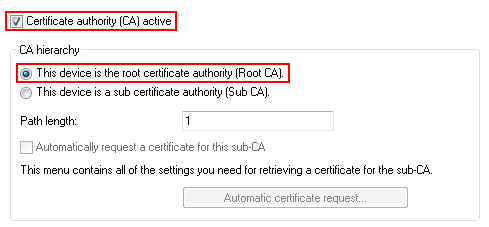
You enable the certificate authority in LANconfig and you set the device as the root CA. You will find these settings under .
-
You are now able to create CA certificates for the VPN endpoints that will later provide the connection.
-
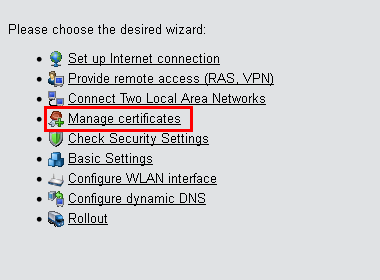
The Setup Wizard Manage certificates helps you to create certificates easily and conveniently.
-
The first page of the Wizard is an overview of all certificates previously issued by the CA.
Note: The certificate of the CA itself is not displayed here.
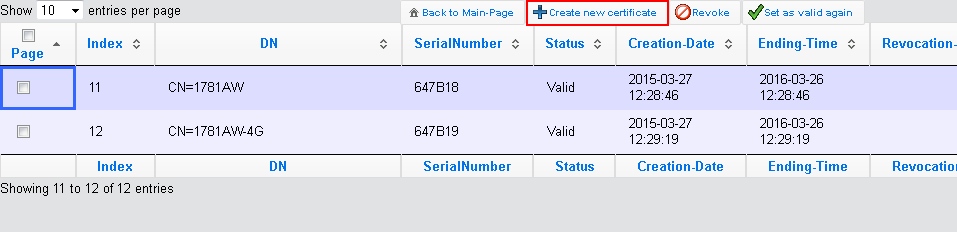
With the Create new certificate button you start the process that generates a new certificate.
-
Under the entry to Enroll certificates, you have the option to configure the profile, the official name of the certificate (common name or CN), and other information that is useful for identifying the certificate. Set the validity period of the certificate and the password for the Pkcs12 file that contains the new certificate, the corresponding private key, and the certificate of the CA.

Once you have entered all the necessary information, you create the certificate by clicking the button Enroll (Pkcs12). The dialog for saving the Pkcs12 file appears automatically once the certificate has been created on the device. This process can take several seconds.
-
In the Save the Pkcs12 file window, choose the location and name of the Pkcs12 file. By default, the file is named according to the following format:
pkcs12<YYYY_MM_DD-hh_mm_ss>.p12
YYYY: Year MM: Month DD: Day hh: Hour mm: Minute ss: Second 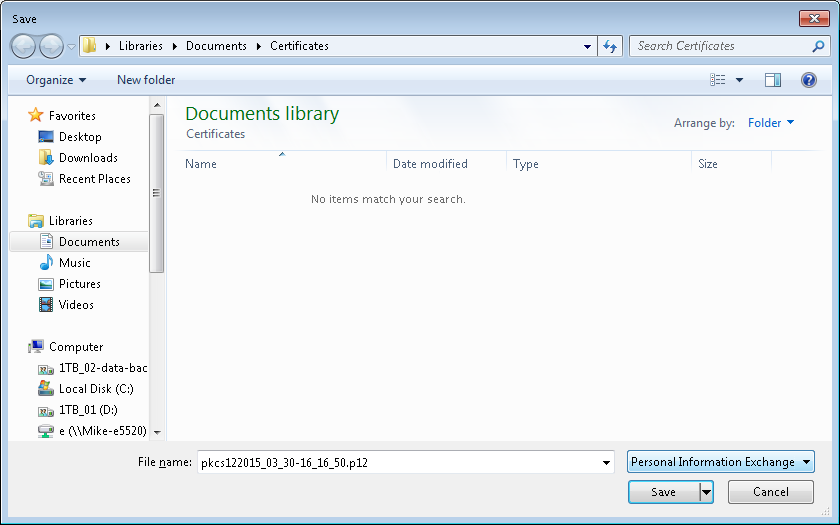
Note: As shown by the example, the file can have any name. -
Use the same method to create further certificates.
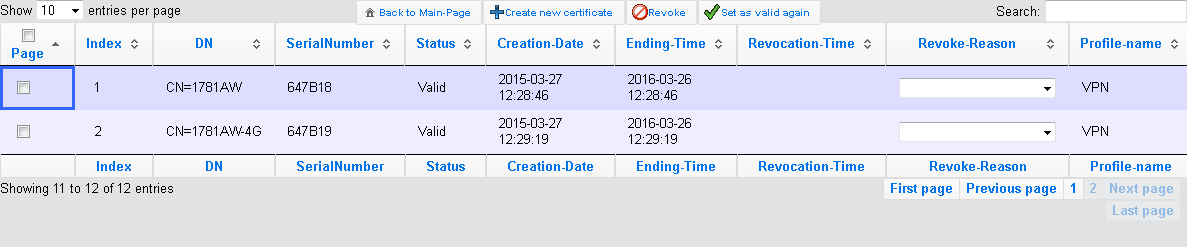
Note: Overview page with two created certificates.
-
The Setup Wizard Manage certificates helps you to create certificates easily and conveniently.
-
In order to use the certificates for a VPN connection, you need to upload them to the devices.
-
Uploading to the corresponding VPN endpoints is easy to do with WEBconfig under .

-
Upload certificate or file
First, select the file type and where to save it. For VPN connections, please choose an unused VPN container.Note: As long as no certificates were set up for VPN, all of the VPN containers are unused.
In the next step you select the Pkcs12 file that contains the certificate that you want to use for this VPN endpoint.
Enter the password that you have set for the file in step 2.c.
Finally, start the upload.
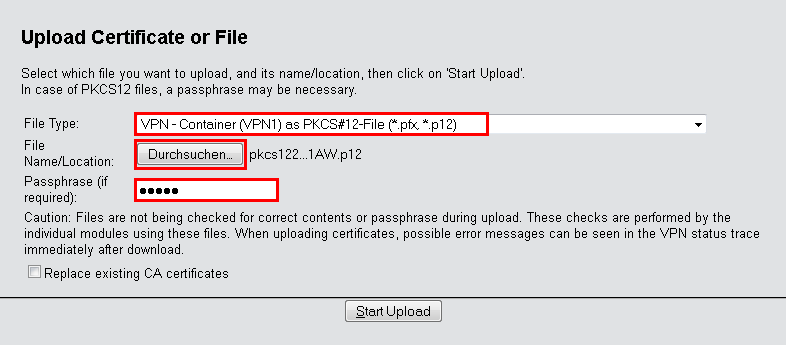
Important: This process is required for all VPN endpoints. Please bear in mind that each VPN endpoint needs a certificate of its own.
-
Uploading to the corresponding VPN endpoints is easy to do with WEBconfig under .
-
Establish a VPN connection between two VPN endpoints. This is carried out via the Setup Wizard Connect two local area networks (VPN).
-
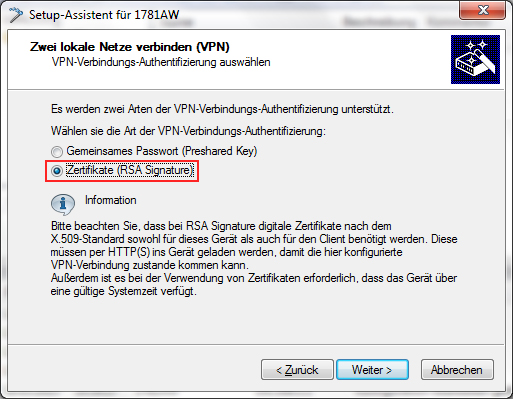
In the Setup Wizard, set the VPN connection authentication to Certificates (RSA signature).
-
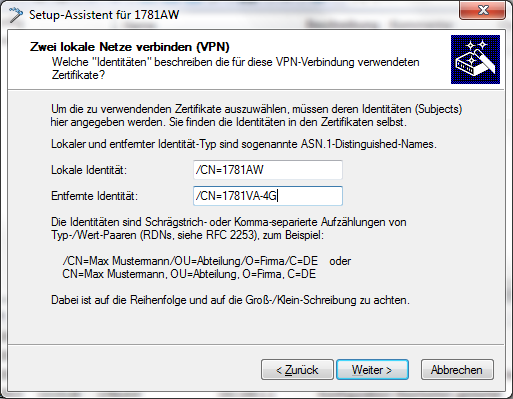
In the Local and remote identity window, specify the "ASN.1-Distinguished-Name". This is the official name of the certificate plus any additional information that you entered in step 2.c. You can see this additional information in the overview of certificates (step 2.e) in the "Name" column. For the Local identity, enter the information for the certificate on the local machine. The item Remote identity contains the certificate information of the other VPN endpoint.
-
In the Setup Wizard, set the VPN connection authentication to Certificates (RSA signature).